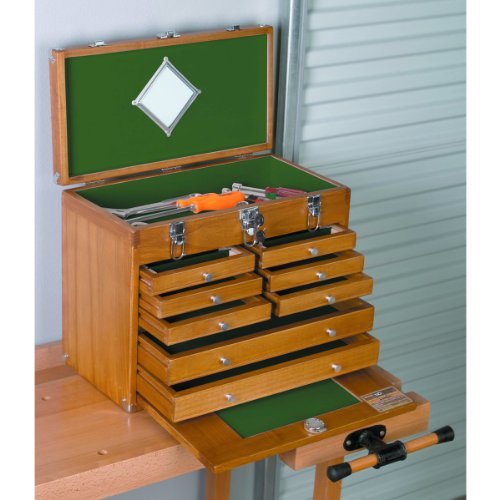
If you’re a handy person who loves to tackle DIY projects or work on various repairs around your home, then having a reliable tool box is a must. While there are plenty of tool boxes available for purchase, building your own out of wood can be a rewarding and cost-effective option.
Building a tool box out of wood offers several advantages. First, it allows you to customize the design and size to fit your specific needs. Whether you have a collection of small hand tools or larger power tools, you can create compartments and dividers to keep everything organized and easily accessible.
Secondly, building a tool box out of wood gives you the opportunity to showcase your woodworking skills and create a unique, one-of-a-kind piece. Not only will you have a functional tool box, but you’ll also have a beautiful handmade creation that you can be proud of.
Tips for Building a DIY Wooden Tool Box
Building your own tool box out of wood can be a rewarding project that not only helps you organize your tools, but also adds a personal touch to your workshop. Here are some tips to consider when embarking on this DIY woodworking project:
1. Plan Your Design
Before starting any woodworking project, it’s important to have a clear plan in place. Decide on the size, shape, and layout of your tool box. Consider how many compartments and drawers you will need to accommodate your tools. Planning ahead will help ensure that your tool box meets your specific needs.
2. Choose the Right Wood
The type of wood you choose for your tool box will impact its durability and appearance. Hardwoods like oak, maple, or walnut are popular choices for their strength and ability to withstand heavy use. Softwoods like pine or cedar can also work well, especially if you prefer a lighter and more rustic look. Select wood that is free of knots, cracks, or other imperfections.
3. Use Proper Joinery Techniques
The joinery techniques you use will determine the overall strength and stability of your tool box. Some common joinery methods for woodworking projects include dovetail joints, mortise and tenon joints, and box joints. Choose a joinery technique that suits your skill level and aligns with your desired aesthetic for the tool box.
4. Don’t Forget About Handles and Hardware
A tool box isn’t complete without handles and hardware. Choose sturdy handles that can support the weight of your tools and ensure easy portability. Consider adding hinges and latches to keep the tool box securely closed. Take your time to select hardware that not only functions well but also enhances the overall look of your tool box.
5. Sand and Finish the Wood
Once you have assembled your tool box, it’s important to sand and finish the wood to protect it from moisture and wear. Start with a coarse sandpaper to smooth out any rough edges or imperfections. Gradually work your way up to a finer grit sandpaper for a smooth and polished finish. Apply a protective finish, such as varnish or polyurethane, to seal the wood and enhance its natural beauty.
With these tips in mind, you’ll be well on your way to building a functional and attractive wooden tool box that will last for years to come. Happy woodworking!
Selecting the Right Wood
When building a tool box out of wood, it’s important to select the right type of wood to ensure durability and functionality. Here are some factors to consider when choosing wood for your project:
Type of Wood
There are various types of wood available, each with its own characteristics. Hardwoods, such as oak or maple, are known for their strength and resistance to wear and tear. Softwoods, like pine or cedar, are more lightweight but may be less durable. Choose a wood type that matches your desired level of sturdiness and appearance.
Moisture Resistance
An important consideration for a tool box is its resistance to moisture. Wood that is highly resistant to moisture, such as teak or cedar, is ideal for tool storage as it helps prevent rust and damage to the tools. Seal the wood with a waterproof finish or paint to further enhance its moisture resistance.
Grain Pattern
The grain pattern of the wood can affect both the appearance and structural integrity of the tool box. Straight grain wood like oak or birch is generally more stable and less prone to warping. Consider the aesthetics you want to achieve and choose a wood with a grain pattern that complements your vision.
Sustainability
Choosing sustainable wood options is crucial for the environment. Look for certifications such as Forest Stewardship Council (FSC) or Programme for the Endorsement of Forest Certification (PEFC) to ensure that the wood comes from responsibly managed forests. This not only helps protect natural resources but also supports ethical and sustainable practices.
By considering these factors, you can select the right wood for your tool box project that will not only meet your functional needs but also provide long-lasting beauty and sustainability.
Gathering the Necessary Tools and Materials
Before you can start building your wooden tool box, you will need to gather the necessary tools and materials. Here is a list of everything you will need:
Tools:
- A saw (such as a circular saw or a hand saw)
- A drill and drill bits
- A hammer
- A tape measure
- A pencil
- A chisel
- A sanding block or sandpaper
- A clamp
- A screwdriver
Materials:
- Wood boards (such as plywood or pine)
- Wood glue
- Screws
- Hinges
- A latch
- Wood filler
- Finishing nails
- Wood stain or paint
Once you have gathered all of these tools and materials, you will be ready to start building your wooden tool box. Make sure you have a clear and organized workspace, and always follow proper safety precautions when using tools. Happy building!
Measuring and Cutting the Wood Pieces
Before you start building your tool box, it’s important to accurately measure and cut the wood pieces you will be using. This will ensure that your tool box ends up being the right size and shape.
Here are some steps to follow when measuring and cutting the wood pieces:
- Start by measuring the height, width, and depth of the tool box you want to build. Sketch out a plan on paper to help you visualize the dimensions.
- Choose the type of wood you want to use for your tool box. Hardwoods like oak or maple are durable and can withstand heavy use. Softwoods like pine or cedar are more affordable options.
- Using a tape measure, mark the measurements on the wood pieces. Be sure to mark both ends of each piece so you have reference points for cutting.
- Next, use a square to draw straight lines across the wood pieces. This will ensure that your cuts are straight and accurate.
- Take your time when cutting the wood pieces. Use a saw that is appropriate for the type of wood you are working with. If you don’t have much experience with cutting wood, it’s a good idea to practice on scrap pieces first.
- After cutting the pieces, use sandpaper to smooth out any rough edges or imperfections. This will give your tool box a professional finish.
- Double check your measurements and make any necessary adjustments before proceeding with assembly. This will save you time and frustration later on.
Remember, accuracy is key when measuring and cutting the wood pieces for your tool box. Taking the time to properly measure and cut will result in a well-built and functional tool box.
Assembling the Toolbox
Once all the pieces of your wooden toolbox have been cut and sanded, it’s time to start assembling them. Follow these steps to put your toolbox together:
1. Arrange the Side Panels
Start by taking the two side panels and placing them parallel to each other on a flat surface. Make sure the inside faces of the panels are facing up.
2. Attach the Bottom Panel
Next, take the bottom panel of the toolbox and align it with the side panels. Use clamps to hold everything in place, ensuring that the edges are flush. Then, use a drill to create pilot holes through the side panels and into the bottom panel.
Once the pilot holes are ready, remove the clamps and drive screws through the holes to secure the bottom panel to the side panels.
3. Install the Divider
If your toolbox design includes a divider, now is the time to install it. Place the divider in position, ensuring that it is centered and aligned with the bottom panel. Again, use clamps to hold everything in place and then drill pilot holes through the side panels and into the divider.
After drilling the pilot holes, secure the divider using screws.
4. Attach the Handle
If desired, you can add a handle to your toolbox for easy carrying. Measure and mark the desired location on the top edges of the side panels. Then, use screws or bolts to attach the handle securely.
Make sure the handle is centered and has enough clearance for your hand to comfortably grip it.
Finally, review the overall construction of your toolbox to ensure that everything is securely fastened and aligned. If needed, make any necessary adjustments before proceeding.
Once you are satisfied with the assembly, you can apply a finish or paint to your toolbox to protect the wood and enhance its appearance. Allow the finish to dry completely before using your new wooden toolbox.
Finishing and Customizing the Toolbox
Once you have completed the construction of your wooden toolbox, it is important to finish and customize it to make it functional and unique. Here are some steps to follow:
- Sanding: Start by sanding the entire toolbox to smoothen any rough edges or surfaces. This will ensure a sleek and professional finish.
- Stain or Paint: Decide whether you want to stain or paint your toolbox. Staining will bring out the natural beauty of the wood grain, while painting will allow you to add color and personality. Choose a high-quality stain or paint that is suitable for wooden surfaces.
- Applying Finish: After staining or painting, apply a clear finish to protect the wood and give it a polished look. Depending on your preference, you can choose a glossy, satin, or matte finish.
- Add Hardware: Install handles, latches, or hinges to enhance the functionality of your toolbox. Choose hardware that matches the overall design and style of your toolbox.
- Personalize: Consider adding personal touches to make your toolbox truly unique. You can carve your initials or a design onto the wood, or even attach stickers or decals.
- Organize the Interior: Use dividers, compartments, or tool holders inside the toolbox to keep your tools organized and easily accessible.
- Protective Cover: If you plan on using your toolbox in different environments, consider adding a protective cover or lining to prevent scratches or damage to the wood.
Remember, the finishing and customization of your toolbox not only adds to its visual appeal but also enhances its functionality. Take your time and enjoy the creative process of making your wooden toolbox truly your own!
FAQ
Can I customize the size of the wooden tool box?
Yes, you can customize the size of your wooden tool box according to your needs. Before starting the construction, determine the dimensions you want for your tool box. Use a measuring tape to mark the dimensions on the wood planks and cut them accordingly. Keep in mind that the size of the tools you plan to store in the tool box should guide your decision in determining the dimensions.