


If you are looking for a unique piece of furniture that will add character and charm to your home, consider making a tool box dresser. This rustic and functional piece is perfect for organizing and storing your tools, while also adding a touch of vintage style to any room.
To make a tool box dresser, you will need some basic woodworking skills and a few materials. First, choose a sturdy wooden box or crate that will serve as the base of your dresser. Look for one with a vintage or distressed look to add authenticity to your piece. Next, gather some old metal handles or pulls to attach to the sides of your dresser to give it that classic tool box look.
Once you have your materials, you can begin the construction process. Start by cleaning and sanding the wooden box to remove any dirt or rough edges. Then, paint or stain the box in a color that matches your home decor. You can even distress the paint finish to give it an aged appearance.
After the paint has dried, attach the metal handles or pulls to the sides of the dresser using screws or nails. Make sure they are securely fastened to ensure the dresser is durable and functional. Finally, add any other decorative elements you desire, such as labels or stencils, to personalize your tool box dresser.
Once your tool box dresser is complete, you can start using it to store your tools and other items. The large drawers provide ample space for keeping your tools organized and easily accessible. Additionally, the unique design of the dresser will be a conversation starter and a focal point in any room.
So why settle for a generic dresser when you can create a one-of-a-kind piece for your home? With some basic woodworking skills and a little creativity, you can make a tool box dresser that is not only functional but also adds a touch of vintage style to your space. Start gathering your materials and get ready to enjoy the satisfaction of building your own unique piece of furniture.
Step-by-Step Guide on How to Make a Tool Box Dresser
Materials needed:
- Wood sheets
- Wood glue
- Screws
- Screwdriver
- Saw
- Sandpaper
- Drill
- Measuring tape
- Paint
- Paintbrush
Step 1: Planning
Start by planning the dimensions and design of your tool box dresser. Measure the space you have available for the dresser and decide on the desired height, width, and depth.
Step 2: Cutting the wood
Using a saw, cut the wood sheets into the desired pieces for the sides, top, bottom, and back of the dresser. Make sure to measure and cut accurately for a precise fit.
Step 3: Sanding and smoothing
Use sandpaper to smooth out any rough edges or surfaces on the wood pieces. This will create a polished finish and prevent any splinters.
Step 4: Assembling the dresser
Begin by attaching the sides to the bottom piece using wood glue and screws. Use a screwdriver or drill to secure the pieces together firmly. Repeat this process to attach the back piece to the sides and bottom.
Step 5: Adding drawers
Measure and cut smaller wood pieces for the drawer fronts and sides. Attach them to the dresser using wood glue and screws. Ensure that the drawers slide smoothly by sanding the edges if necessary.
Step 6: Finishing touches
Apply a coat of paint to the dresser and drawers in the color of your choice. Allow the paint to dry completely before applying a second coat if desired. Add any additional decorative elements or hardware to complete the look.
Step 7: Placement and organization
Once the dresser is fully assembled and finished, decide on the best place to put it in your workshop or tool shed. Organize your tools and accessories in the drawers for easy access and a neat and tidy work area.
Congratulations! You have successfully created your own tool box dresser. This functional and stylish piece will not only provide storage space for your tools but also add a touch of personality to your workshop.
Gather Necessary Materials
Before you begin building your tool box dresser, it’s important to gather all the necessary materials. Here is a list of items you will need:
Materials:
- Plywood sheets: You will need 2 plywood sheets to create the base and back of the dresser.
- Pine boards: Pine boards will be used to build the frame of the dresser. Measure and cut the boards according to your desired dimensions.
- Wood glue: Use wood glue to securely attach the plywood sheets and pine boards together.
- Nails: Nails will be needed to reinforce the joints of the dresser. Make sure to use nails that are suitable for the thickness of the wood.
- Screws: Screws will be used to attach the drawer slides and knobs.
- L-brackets: L-brackets will provide additional support for the dresser.
- Drawer slides: Purchase drawer slides that are suitable for the size and weight of the drawers you plan to install.
- Knobs: Choose knobs that match the style of the dresser and the overall theme of your room.
- Sandpaper: Sandpaper will be needed to smooth out any rough edges or surfaces.
- Paint or stain: Depending on your preference, you can paint or stain the dresser to achieve the desired look.
- Paintbrushes: Use paintbrushes of various sizes to apply the paint or stain evenly.
Make sure to gather all the required materials before you start building your tool box dresser. It’s always better to have everything on hand to avoid any delays or interruptions during the construction process.
Prepare the Wood for Construction
Before you start constructing your tool box dresser, it’s important to properly prepare the wood. This will ensure that your dresser is sturdy and built to last. Here are some steps you can follow to prepare the wood:
1. Measure and cut the wood pieces: Start by measuring and cutting the wooden boards according to the dimensions of your tool box dresser. Use a measuring tape and a saw to make accurate cuts.
2. Sand the surfaces: Once you have cut the wood pieces, use sandpaper to smooth out any rough edges or surfaces. Sanding will also remove any splinters or imperfections in the wood. Make sure to sand all sides of the wood pieces.
3. Drill pilot holes: Before assembling the dresser, it’s a good idea to drill pilot holes in the wooden boards. This will make it easier to attach the screws or nails and prevent the wood from splitting. Use a drill bit that is slightly smaller than the screws or nails you will be using.
4. Apply wood finish: If desired, you can apply a wood finish to enhance the appearance and protect the wood. Choose a finish that suits your style and follow the manufacturer’s instructions for application. Make sure to let the finish dry completely before moving on to the construction phase.
By following these steps to prepare the wood, you will ensure that your tool box dresser is well-built and ready for construction. Taking the time to properly prepare the wood will result in a high-quality finished product.
Cut and Assemble the Box Frame
To begin building your toolbox dresser, you will need to cut and assemble the box frame. This frame will serve as the main structure of the dresser and hold all of the drawers and shelves.
Start by measuring and cutting the plywood boards to the desired dimensions. You will need two long boards for the sides of the box and two shorter boards for the top and bottom. Make sure to use a saw with a fine-tooth blade to ensure clean and precise cuts.
Once you have all the boards cut to size, you can start assembling the box frame. Use wood glue along the edges of the boards and secure them together using screws or nails. Make sure to pre-drill any screw holes to prevent the wood from splitting.
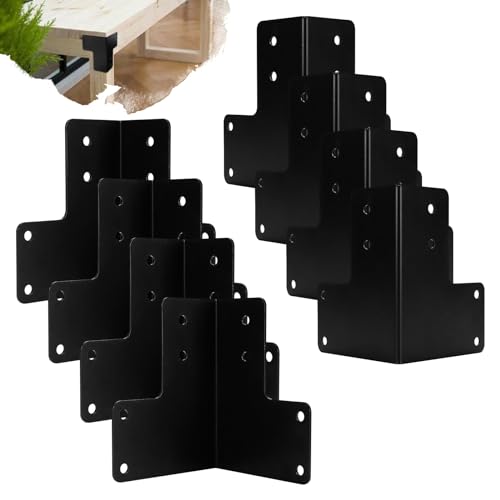
After the glue has dried and the frame is secure, reinforce the joints with corner brackets for added stability. These brackets can be attached using screws or nails.
Finally, check that the frame is square and level using a carpenter’s square and a level. Adjust as necessary before allowing the glue to fully dry.
Once the box frame is complete, you can move on to building the drawers and adding any additional features or decorations to your toolbox dresser.
Add Drawers and Hardware
Now that the main structure of the toolbox dresser is complete, it’s time to add the drawers and hardware. This will allow you to store and organize items securely.
Before starting, measure the dimensions of the drawer openings and cut the drawer pieces accordingly. Use plywood or any sturdy material for the drawer boxes.
1. Assemble the drawer boxes by joining the sides, back, and bottom pieces with screws or nails. Make sure the corners are square and reinforce them with additional wood glue if needed.
2. Attach drawer slides to the sides of the dresser and the corresponding sides of the drawer boxes. Follow the manufacturer’s instructions for accurate installation.
3. Place the drawer boxes onto the slides and test their smoothness. Adjust the slides if necessary to ensure that the drawers open and close effortlessly.
4. Install drawer fronts by attaching them to the fronts of the drawer boxes. Use screws or nails to secure them in place. Make sure they are aligned properly and evenly spaced.
5. Choose decorative hardware, such as drawer pulls or knobs, to complete the look of the toolbox dresser. Attach the hardware to the drawer fronts using the provided screws or bolts.
6. Give the drawers a final check to make sure they operate smoothly and are securely attached. Make any necessary adjustments or repairs before using the toolbox dresser.
By adding drawers and hardware, your toolbox dresser will not only look more authentic but also provide functional storage space. Take your time during this step to ensure a well-built and visually appealing final product.
Sand and Finish the Dresser
After assembling the tool box dresser, the next step is to sand and finish it to achieve a smooth and polished look. Follow these steps to complete this process:
1. Sand: Start by sanding the entire surface of the dresser using a coarse-grit sandpaper. This will help remove any rough edges or imperfections in the wood. Be sure to sand in the direction of the grain to avoid scratching the wood.
2. Fill any gaps: If you notice any small gaps or holes in the dresser, use wood filler or putty to fill them in. Apply the filler with a putty knife, making sure to smooth it out and remove any excess before it dries.
3. Sand again: After the filler has dried, sand the entire surface again, this time using a finer-grit sandpaper. This will help create an even smoother surface.
4. Apply stain or paint: Once the dresser is sanded to your desired smoothness, you can choose to apply a stain or paint to enhance its appearance. Apply the stain or paint using a brush or rag, following the manufacturer’s instructions. Allow it to dry completely before moving on to the next step.
5. Seal: To protect the dresser and give it a glossy finish, apply a clear sealant or protective coat. This will help prevent scratches and keep the dresser looking fresh for years to come. Apply the sealant using a brush or roller, making sure to cover all surfaces evenly.
6. Optional: Add hardware: If desired, you can add decorative hardware to the dresser to complete the tool box look. Choose handles or knobs that match your personal style and attach them securely to the drawers.
Remember, take your time and work in a well-ventilated area when sanding and finishing the dresser. This will ensure the best results and help you create a piece of furniture that you can be proud of.
Final Touches and Decoration for the Tool Box Dresser
Once you have completed building the tool box dresser, it’s time to add some final touches and decorations to make it truly unique. Here are a few ideas:
- Paint or Stain: Consider painting or staining the dresser to match your personal style or the decor of the room. You can use bright colors for a fun look or opt for a more rustic stain for a vintage feel.
- Hardware: Choose hardware that complements the overall design of the dresser. You can use decorative handles and knobs to add a touch of elegance or go for more industrial-looking pulls for a modern twist.
- Decals or Stickers: Add decals or stickers to the sides of the tool box dresser to create a personalized look. You could choose stickers that represent your favorite tools or add a quote or saying that inspires you.
- Drawer Liners: Line the drawers of the dresser with decorative paper or fabric to protect the contents and add a pop of color or pattern. This is also a great way to add a personal touch to each drawer.
- Labels: Attach labels to each drawer to help keep things organized. You can use pre-made labels or create your own using a label maker or decorative paper and adhesive.
- Accessorize: Once the dresser is complete, you can add some finishing touches by accessorizing with tools or tool-themed items. Hang a small tool belt on one side, use a toolbox as a nightstand, or display small tools on top of the dresser.
Remember, the final touches and decorations should reflect your personal style and preferences. Have fun with the process and enjoy the unique and functional piece of furniture you have created!


