


When it comes to organizing your tools, a metal tool box with drawers can be a game-changer. Not only does it provide a secure and portable storage solution, but it also allows you to categorize and access your tools with ease. But how do you go about making your own metal tool box drawers?
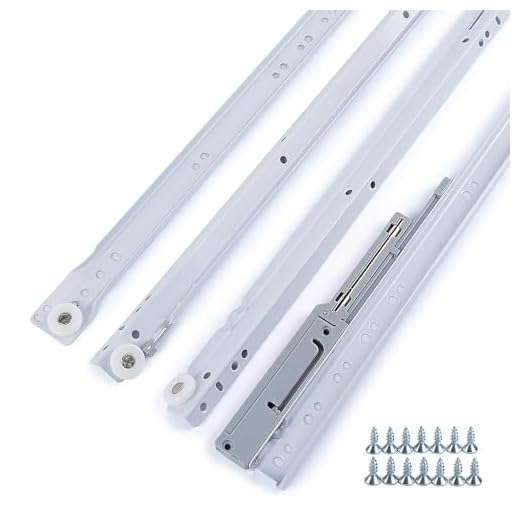
Firstly, you’ll need to gather the necessary materials and tools. This includes a sheet of metal, preferably aluminum or steel, a ruler or measuring tape, a marker or pencil, a metal cutting tool such as a jigsaw or metal shears, a drill, screws or rivets, a screwdriver or rivet gun, and optional drawer slides for smoother operation.
Once you have all the materials, you can start by measuring and marking the dimensions for your drawers on the metal sheet. Make sure to take into account the size of the tools you’ll be storing and leave some extra space for clearance. Use a ruler or measuring tape to ensure accurate measurements, and a marker or pencil to mark the lines on the metal sheet.
Next, use your metal cutting tool to carefully cut along the marked lines. Take your time and make sure to follow the lines accurately to ensure clean and precise cuts. If you’re using a jigsaw, start with a pilot hole near one of the corners and then proceed to cut along the lines. If you’re using metal shears, apply firm pressure and make smooth, continuous cuts.
Once you have all the drawer pieces cut out, you can start assembling them. Use a drill to create holes for the screws or rivets, making sure to align the holes properly for a snug fit. Attach the sides and back of the drawers to the bottom piece, using screws or rivets and a screwdriver or rivet gun. If you prefer smoother drawer operation, you can also install drawer slides at this step.
Steps to Make Metal Tool Box Drawers
Metal tool box drawers are a great addition to any workspace, providing a convenient and organized way to store and access tools. If you’re interested in making your own metal tool box drawers, follow these steps:
1. Measure and Plan
Start by measuring the dimensions of your tool box and determining how many drawers you want to make. Consider the size of your tools and their storage needs when planning the dimensions of each drawer.
2. Gather Materials
Next, gather all the materials you’ll need for the project. This typically includes sheet metal, drawer slides, hinges, handles, and any necessary hardware. Make sure you have the correct tools, such as a tape measure, saw, drill, and screwdriver.
3. Cut the Metal
Using your measurements, begin cutting the sheet metal into the desired dimensions for the drawers. Ensure your edges are smooth and clean to avoid any potential injuries. You may also want to add any necessary holes or slots for handles or locks.
4. Assemble the Drawers
Next, assemble the drawers using the cut pieces of sheet metal. Attach the sides, bottom, and back using screws or welding, depending on your preferred method. Make sure the corners are square and reinforce them with additional brackets or welds if needed. Test the fit within the tool box.
5. Attach Drawer Slides
Install the drawer slides on both sides of each drawer and attach them securely. This will ensure smooth opening and closing of the drawers. Follow the manufacturer’s instructions for proper installation.
6. Install Hinges and Handles
If desired, attach hinges to the front of the drawers and then install handles on each drawer. Make sure the hinges and handles are securely fastened and allow for easy access. These additions will enhance the functionality of your tool box drawers.
7. Test and Adjust
Before using your tool box drawers, test them by opening and closing each drawer multiple times. Make any necessary adjustments to ensure they glide smoothly and fit properly within the tool box.
8. Secure Drawers in Tool Box
Finally, secure the drawers in the tool box, ensuring they are level and secure. This may involve attaching additional brackets or screws to hold the drawers in place. Once everything is secure, organize your tools and enjoy your newly made metal tool box drawers!
Gather Necessary Materials
Before you begin making metal tool box drawers, you will need to gather the following materials:
- A sheet of metal in the desired thickness and size for the drawers
- A metal cutting tool, such as a jigsaw or angle grinder
- A metal bending tool, such as a metal brake or vise
- Measuring tape
- Marker or pen for marking measurements
- Clamps or a vice grip to secure the metal during cutting and bending
- Sandpaper or a metal file for smoothing rough edges
- Drill and drill bits for making holes for screws or rivets
- Screws or rivets for assembling the drawers
- A screwdriver or rivet gun for fastening the screws or rivets
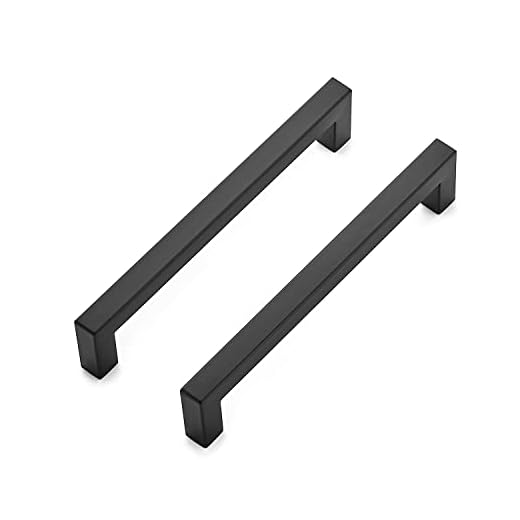
- Optional: drawer handles or knobs for easier opening and closing
Having these materials ready before you start will ensure a smoother and more efficient process of making your metal tool box drawers.
Measure and Cut Metal Sheets
Before you can start constructing the drawers for your metal tool box, you will need to accurately measure and cut the metal sheets that will form the sides, bottom, and back of each drawer. Follow these steps to ensure precise measurements:
-
Gather the necessary tools and materials
Before you begin, make sure you have the following items:
- Measuring tape or ruler
- Marker or pencil
- Metal cutting shears or electric metal nibbler
- Safety goggles and gloves
-
Measure the dimensions of your drawers
Using a measuring tape or ruler, determine the desired length, width, and height of each drawer. It’s important to take accurate measurements to ensure a proper fit.
-
Transfer measurements to the metal sheets
Using a marker or pencil, mark the measurements on the metal sheets. Make sure to include the necessary allowances for the fold and overlap of the metal. Precision is key to achieving a tight and sturdy fit.
-
Cut the metal sheets
Put on your safety goggles and gloves before proceeding. Use metal cutting shears or an electric metal nibbler to cut along the marked lines on the metal sheets. Take your time and make steady cuts to ensure accuracy.
-
Smooth the edges
After cutting, use a file or sandpaper to smooth any rough edges on the metal sheets. This will help prevent injuries and ensure a clean finish.
Once you have measured and cut the metal sheets, you will be ready to assemble the drawers for your metal tool box. Follow the remaining steps in this guide to complete your project.
Assemble and Weld Drawer Components
Once you have cut all the necessary pieces for your metal toolbox drawers, it’s time to assemble and weld the components together. Here is a step-by-step guide to help you through the process:
Step 1: Dry Fit the Components
Before you start welding, it’s essential to do a dry fit of all the drawer components. Place the front, back, and side pieces together to ensure they fit correctly and the drawer is square. This step is crucial to ensure that the final product aligns correctly.
Step 2: Clamp the Components
Once you are satisfied with the fit, use clamps to hold the drawer components together. This will make it easier to weld without any misalignment. Use a square or ruler to double-check that everything is lined up correctly.
Step 3: Welding
Now it’s time to weld the components together. Start by tack welding the corners of the drawer, making sure it remains square and aligned. After tacking, continue welding along the seams until they are fully joined. Use appropriate welding techniques and safety precautions, ensuring strong and secure welds.
Repeat the above steps for each drawer component, following the measurements and assembly instructions specific to your toolbox design.
Note: If you are not comfortable with welding or do not have access to welding equipment, consider seeking assistance from a professional welder to ensure the drawers are properly assembled.
Once all the components are welded together, allow the drawers to cool down before continuing to the next step in the process. The welded components should be sturdy and ready for the next stage of creating your metal toolbox.
Remember to take appropriate safety precautions, such as wearing welding gloves, a welding mask, and working in a well-ventilated area. If you are new to welding, it is advisable to practice your welding skills on scrap metal before working on your project.
FAQ
Can I make metal tool box drawers without welding?
Yes, it is possible to make metal tool box drawers without welding. Instead of welding, you can use screws or rivets to join the metal pieces together. This can be a suitable alternative if you do not have access to a welding machine or if you are not comfortable with welding. Just make sure to choose strong screws or rivets that can securely hold the metal parts in place.


