
KYB motorcycle forks are known for their high-quality performance and durability, making them a popular choice among riders. However, like any other component on a motorcycle, they require regular maintenance and adjustment to perform optimally. Properly setting up your KYB motorcycle forks can improve handling, increase stability, and enhance your overall riding experience.
Before diving into the setup process, it’s important to note that every motorcycle and rider is unique, so there isn’t a one-size-fits-all approach. The setup process may vary depending on various factors, such as the type of riding you do, your weight, and skill level.
1. Adjusting Fork Sag: Sag refers to the amount of suspension travel the forks take up when the rider is sitting on the bike. To set the sag, start by putting on all your riding gear and sitting on the bike in your normal riding position. Measure the distance between the axle and a fixed point on the bike, and take note of the measurement. Then, carefully lift the front end of the bike off the ground, and measure the new distance between the same points. The sag value is the difference between the two measurements.
2. Setting Compression Damping: Compression damping controls how the forks react to bumps and impacts. Start by locating the compression damping adjuster on each fork leg. Turning the adjuster clockwise will increase the compression damping, while turning it counterclockwise will decrease it. Find a setting that works best for you, taking into account your riding style and the terrain you frequently ride on.
3. Adjusting Rebound Damping: Rebound damping affects how the forks return to their normal position after compressing. Similar to compression damping, find the rebound damping adjuster on each fork leg. Turning it clockwise will increase the rebound damping, while turning it counterclockwise will decrease it. Again, experiment with different settings to find the optimal rebound damping that suits your riding style and the conditions you ride in.
Remember that the above steps are just a starting point, and it may take some trial and error to find the perfect setup for your KYB motorcycle forks. It is also recommended to consult your motorcycle’s user manual or seek assistance from a professional if you are unsure about any specific adjustments.
In conclusion, properly setting up your KYB motorcycle forks can greatly enhance your riding experience. By adjusting the sag, compression damping, and rebound damping, you can find the perfect balance and improve the overall performance of your forks. Take the time to experiment and fine-tune the settings to suit your specific needs and riding style. Happy riding!
Preparing Your Bike and Tools for Fork Setup
Before you start setting up your KYB motorcycle forks, it’s important to prepare your bike and gather the necessary tools. Follow these steps to ensure a smooth and efficient fork setup process:
- Choose a suitable location: Find a well-lit and spacious area where you can comfortably work on your bike. This will allow you to have enough room to move around and ensure that you can properly inspect and adjust your motorcycle forks.
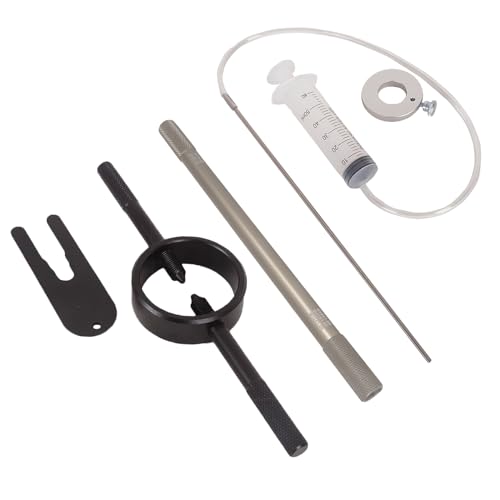
- Gather the necessary tools: Make sure you have all the tools required for the fork setup process. Here are some of the essential tools you will need:
- Socket set
- Torque wrench
- Allen wrench set
- Fork oil
- Oil measuring cups
- Fork seal driver
- Fork oil level gauge
- Fork spring compressor
- Shop towels
- Prepare your bike: Clean your bike thoroughly to remove any dirt, grime, or debris that might affect the fork setup process. This will ensure accurate measurement and prevent any potential damage to your motorcycle forks.
- Secure your bike: Use a motorcycle stand or a sturdy jack to lift and secure your bike in an upright position. This will give you better access to the front fork area and prevent the bike from tipping over during the setup.
- Protect your bike: Use soft padding or cloth to cover any parts of your bike that might come into contact with tools or surfaces during the fork setup process. This will help prevent scratches or damage to your bike’s paintwork or other delicate components.
- Organize your tools: Arrange your tools in an organized manner so that they are easily accessible during the setup process. This will save you time and prevent any unnecessary frustration as you work on your motorcycle forks.
By preparing your bike and tools before setting up your KYB motorcycle forks, you’ll be able to work efficiently and effectively, ensuring optimal performance and safety for your ride.
Removing the Old Forks
To begin the process of setting up KYB motorcycle forks, you first need to remove the old forks from your bike. Follow the steps below to ensure a safe and smooth removal:
- Begin by raising the front end of your motorcycle off the ground using a suitable lift or stand. This will provide you with easy access to the forks.
- Using an appropriate sized wrench, loosen and remove the axle pinch bolts located on the bottom of the forks. These bolts secure the front axle and prevent it from sliding out of place.
- Gently slide the front axle out of the axle holders and remove it from your motorcycle. Take care not to damage the axle or the surrounding components.
- Next, locate the bolts that attach the fork tubes to the triple clamps. These bolts are typically located at the top of the fork tubes and may require an Allen key or socket wrench to remove.
- Once the bolts have been removed, carefully slide the fork tubes out of the triple clamps. Be sure to support the weight of the fork tubes to prevent them from falling or causing damage.
- With the fork tubes removed from the triple clamps, you can now detach the front fender if necessary. This can usually be done by removing the bolts or screws that secure it to the forks.
- Finally, with the front fender detached if applicable, you can completely remove the old forks from your motorcycle. Take care when handling the forks to avoid any scratches or damage.
Once the old forks have been removed, you can proceed with setting up the new KYB motorcycle forks according to the manufacturer’s instructions. Make sure to clean and inspect all components before installation to ensure optimal performance.
Installing the KYB Motorcycle Forks
Installing KYB motorcycle forks is a straightforward process that requires attention to detail and proper tools. Follow these steps to ensure a successful installation:
Step 1: Preparing the Motorcycle
Before starting the installation process, make sure to clean the area around the fork tubes and remove any dirt or debris. This will help prevent any particles from getting inside the fork assembly during installation.
Step 2: Removing the Old Forks
Begin by removing the front wheel and loosening the pinch bolts on the triple clamps to release the old forks. Carefully slide the old forks out of the triple clamps, making note of their orientation.
Step 3: Preparing the New Forks
Inspect the new KYB motorcycle forks for any damage or defects. It is crucial to check for proper assembly, including the alignment of the fork tubes and seals. Apply a small amount of fork oil to the fork tubes to ensure smooth operation.
Step 4: Installing the New Forks
Slide the new forks into the triple clamps, ensuring they are aligned with the correct orientation as noted from the old forks. Tighten the pinch bolts on the triple clamps to secure the forks in place. Use a torque wrench to tighten the bolts to the manufacturer’s specifications.
Step 5: Reinstalling the Front Wheel
Once the new forks are installed and secured, reattach the front wheel. Double-check that the axle is aligned properly and that the axle nut is torqued to the manufacturer’s specifications. Tighten the pinch bolts on the triple clamps again to ensure the forks are secure.
Step 6: Testing the Forks
After completing the installation, take the motorcycle for a test ride to ensure the forks are functioning correctly. Evaluate the handling, suspension, and braking performance to ensure everything is working as expected.
By following these steps, you can successfully install KYB motorcycle forks and enjoy improved suspension performance on your motorcycle.
Adjusting the Fork Compression and Rebound
When setting up your KYB motorcycle forks, it’s important to adjust the compression and rebound to achieve the desired suspension performance. Compression refers to the resistance the fork offers when it is compressed, while rebound refers to the speed at which the fork extends back to its full position after being compressed.
Step 1: Compression Adjustment
To adjust the compression, locate the compression adjustment screw on the fork. Turn the screw clockwise to increase the compression damping, which will make the fork stiffer and slower to compress. Turn the screw counterclockwise to decrease the compression damping, making the fork softer and quicker to compress.
Step 2: Rebound Adjustment
To adjust the rebound, locate the rebound adjustment screw on the fork. Turn the screw clockwise to increase the rebound damping, which will make the fork extend slower after being compressed. Turn the screw counterclockwise to decrease the rebound damping, allowing the fork to extend quicker after compression.
It’s important to find the right balance between compression and rebound to achieve optimal performance. If you’re encountering excessive diving in corners or a harsh ride, you may need to increase the compression damping. On the other hand, if the fork isn’t extending fully after compression or feels too harsh over bumps, you may need to decrease the rebound damping.
Remember to make small adjustments and test the fork’s performance after each adjustment. It may take some trial and error to find the perfect setting for your riding style and conditions. Keep in mind that adjusting the compression and rebound can greatly influence the overall stability, handling, and comfort of your bike, so take the time to fine-tune these settings for an unparalleled riding experience.
Performing Final Checks and Safety Precautions for Proper Functioning
After setting up your KYB motorcycle forks, it is crucial to perform a series of final checks and follow safety precautions to ensure proper functioning. This step ensures your safety and prevents any potential issues on the road.
Here are some important checks and precautions to consider:
- Check for leaks: Inspect the fork seals and dust wipers for any signs of oil leaks. If you notice any leaks, they should be addressed immediately. Leaking seals can affect the performance and longevity of your forks.
- Verify proper rebound and compression settings: Make sure that the rebound and compression settings are correctly adjusted according to your riding preferences and the terrain you will be navigating.
- Check the fork caps: Ensure that the fork caps are tightened securely to prevent any issues during your ride. Loose fork caps can lead to handling problems and affect the overall performance of your motorcycle.
- Inspect the fork alignment: Verify that both forks are aligned properly and symmetrically. Misalignment can cause instability and affect the handling of your motorcycle.
- Ensure proper preload: Check the preload settings to ensure they are adjusted correctly. Proper preload helps maintain proper suspension performance and responsiveness.
- Grease and lubricate: Apply a suitable grease or lubricant to key areas such as the fork bushings and seals. This helps reduce friction and prolongs the life of your forks.
- Perform a test ride: Before hitting the road, take your motorcycle for a test ride to evaluate the performance of the forks. Pay attention to the suspension response, damping, and overall handling.
Remember, these final checks and safety precautions are crucial to ensure the proper functioning and performance of your KYB motorcycle forks. Neglecting these steps may lead to potential issues or accidents while riding. If you are unsure about any aspect of the setup or have concerns, it is advisable to consult a professional mechanic or refer to the manufacturer’s guidelines for further assistance.


